

How InfluxDB runs it
InfluxDB 3 stores rows in tables, like any database, with one difference that matters here: every row carries a timestamp, and a column can be empty on some rows and filled on others. A sensor that stops reporting leaves its column empty while the columns beside it keep filling. InfluxDB 3 also has a Processing Engine, which runs Python inside the database itself, either on a schedule or when you call an HTTP endpoint. Nori ships as one of those plugins,nori_regression,
published in InfluxData’s plugin repository. There is no service to deploy next to
your database and no data to export.
What a run does
Take a table of cooling-unit telemetry. Its coolant temperature probe stopped reporting at 20:00, while motor current, vibration and inlet temperature kept coming in:
One run does three things:
- Reads a window of rows from that table.
- Takes the rows that have
coolant_tempas its examples, and predicts the rows that do not, frommotor_current,vibrationandinlet_temp. - Writes the predictions into a new table,
cooling_unit_regressed:
Your original table is never modified, so a measured value and a predicted one
stay distinguishable. Query and chart
cooling_unit_regressed like any other
table.
Before you start
- InfluxDB 3 Core or Enterprise, version 3.8.2 or later, started with the
Processing Engine enabled (
influxdb3 serve --plugin-dir /path/to/plugins). - HTTPS egress from the InfluxDB host to the Nori gateway.
- Numeric feature columns. Encode categorical columns before calling.
Set up
1
Get a Nori API key
Create one from the API key page if you do not have one
already.
2
Install the plugin
In InfluxDB 3 Explorer, open Manage Plugins → Plugin Library and search
for 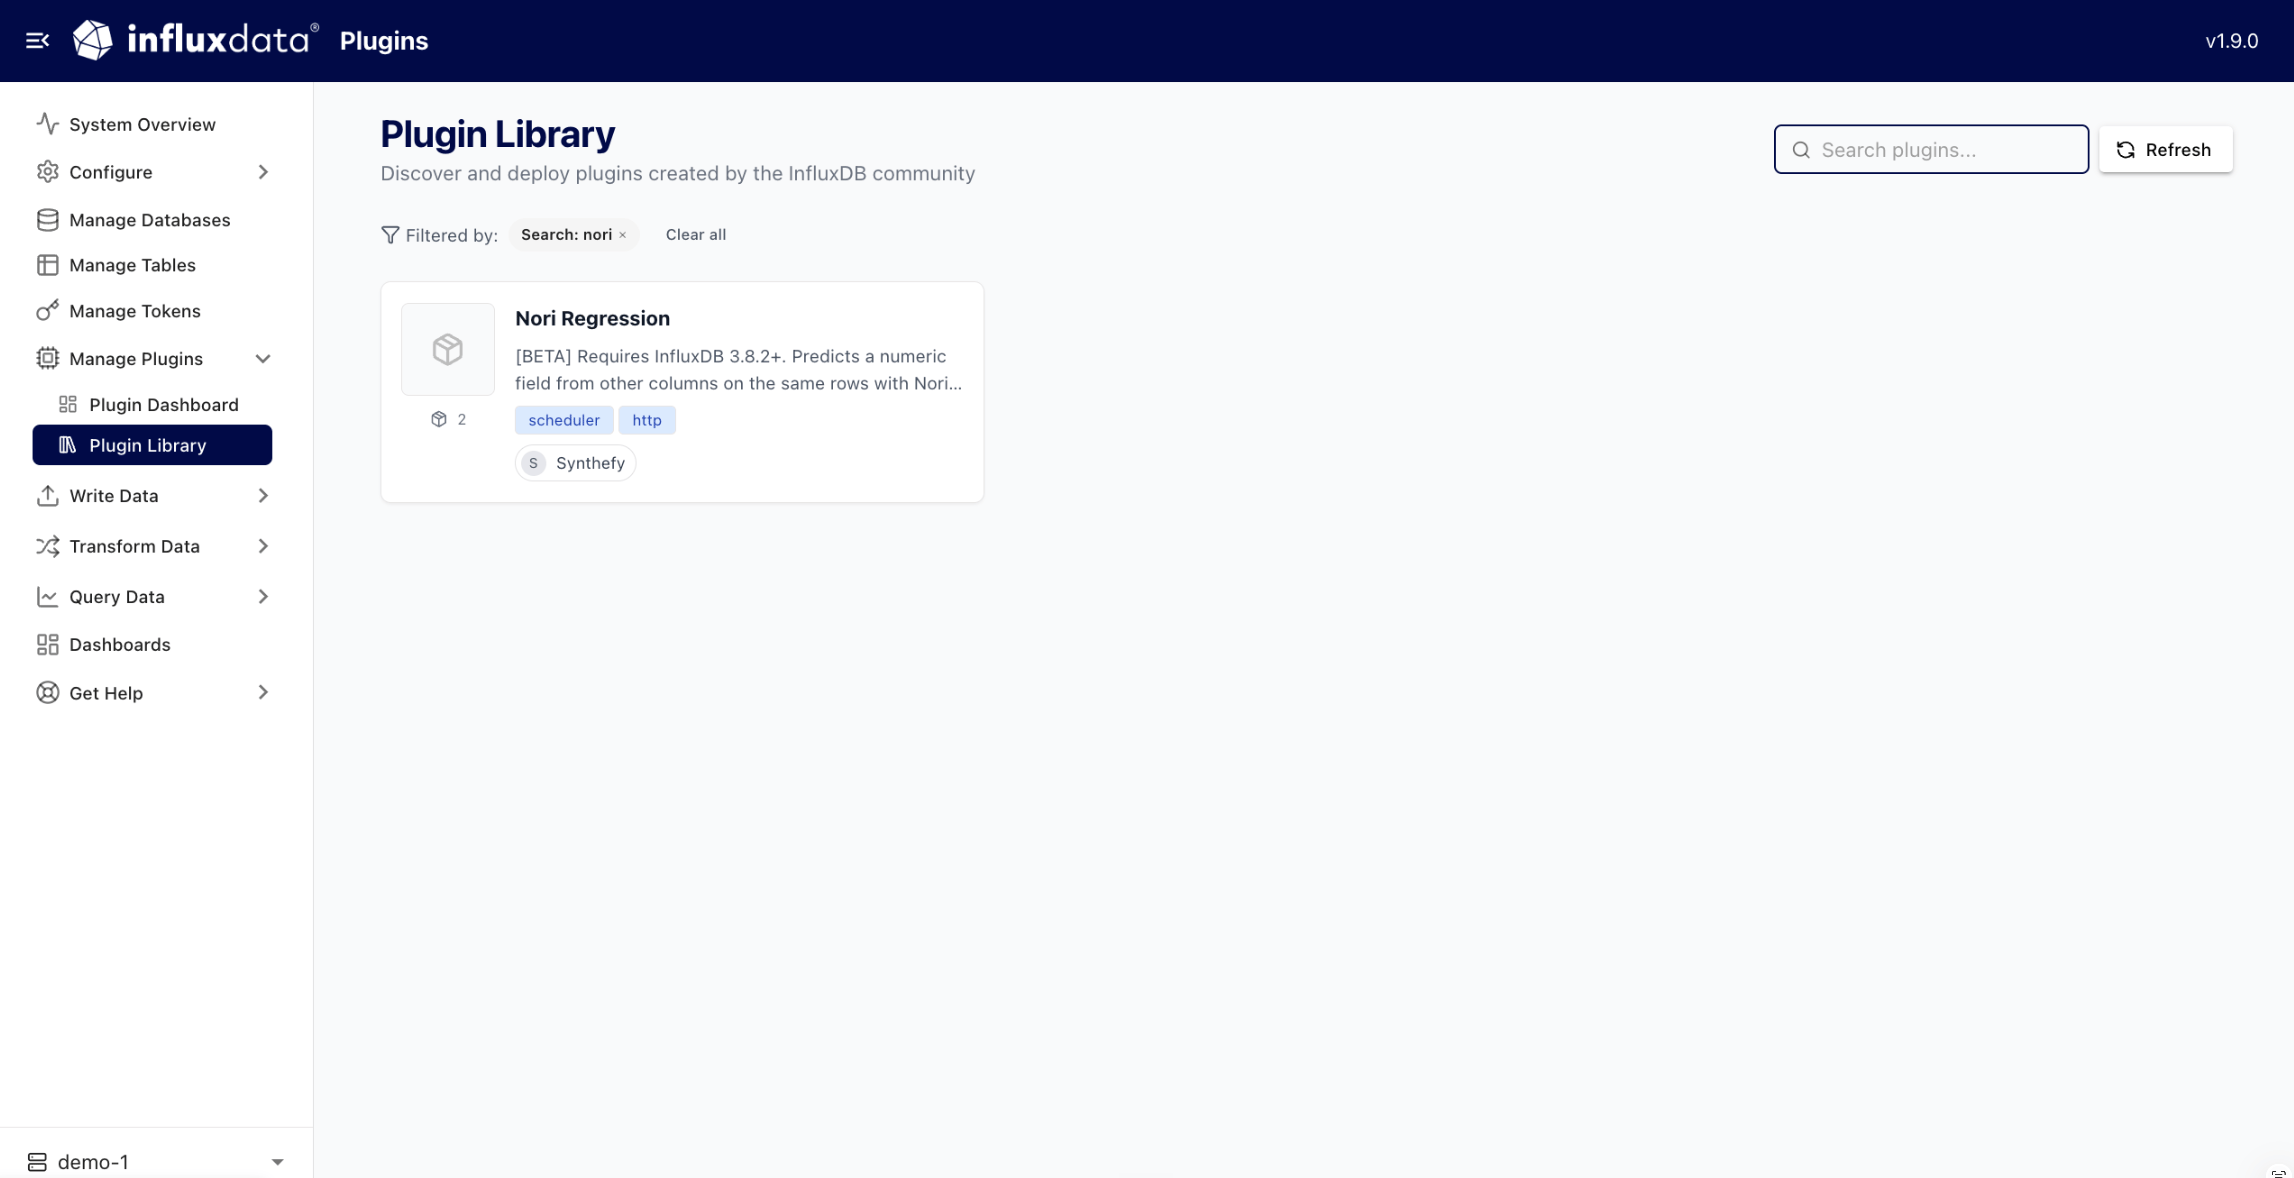
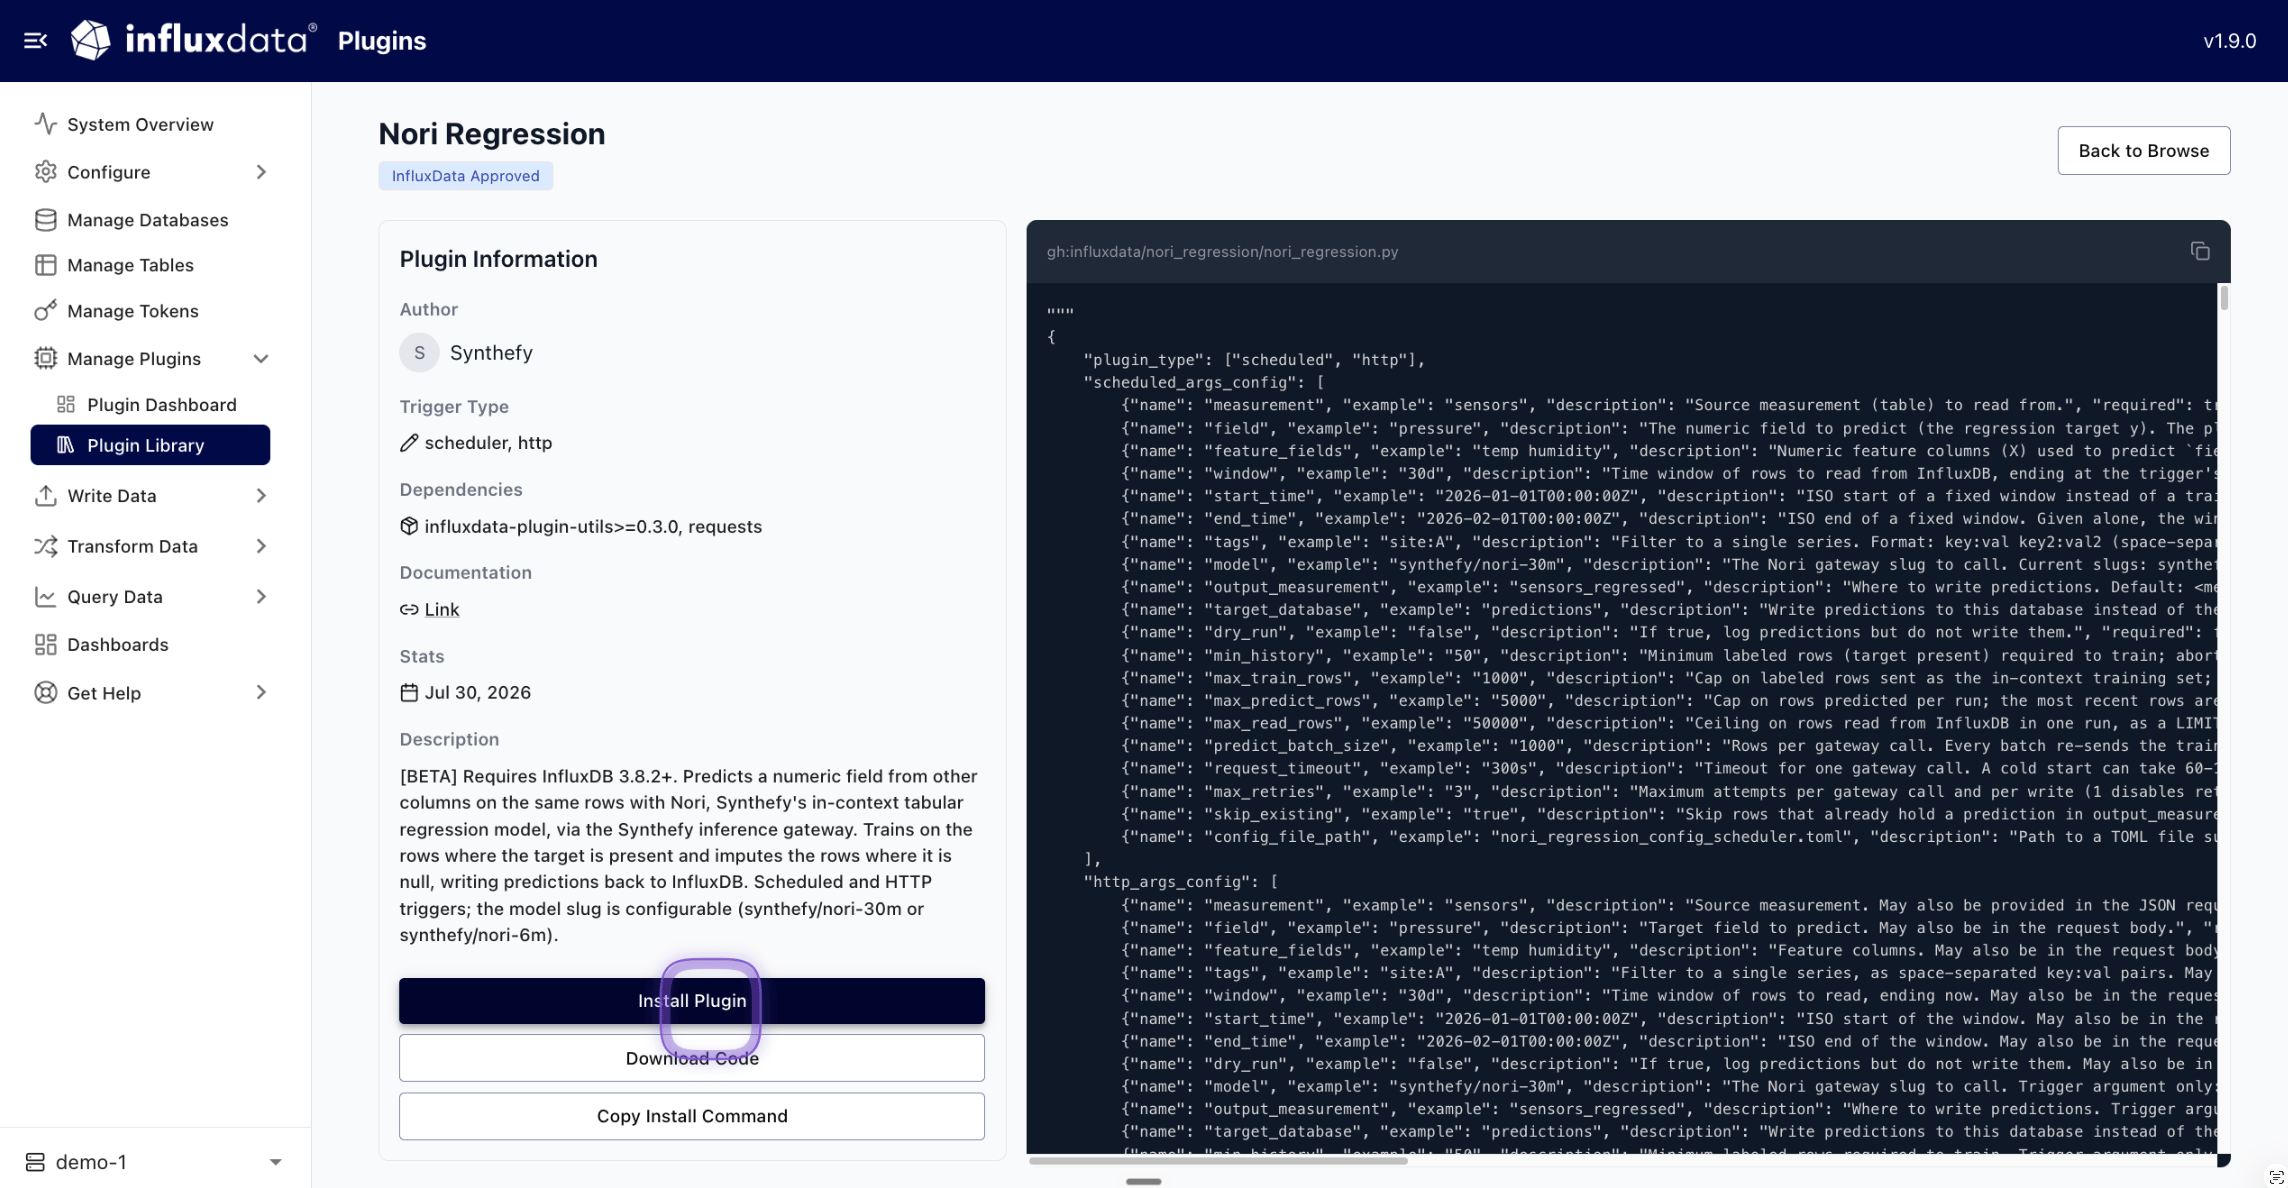
nori.3
Create a trigger
The trigger says which table to read and what to predict. Give it an
HTTP Endpoint type so you can run it whenever you want, and add one
argument per row: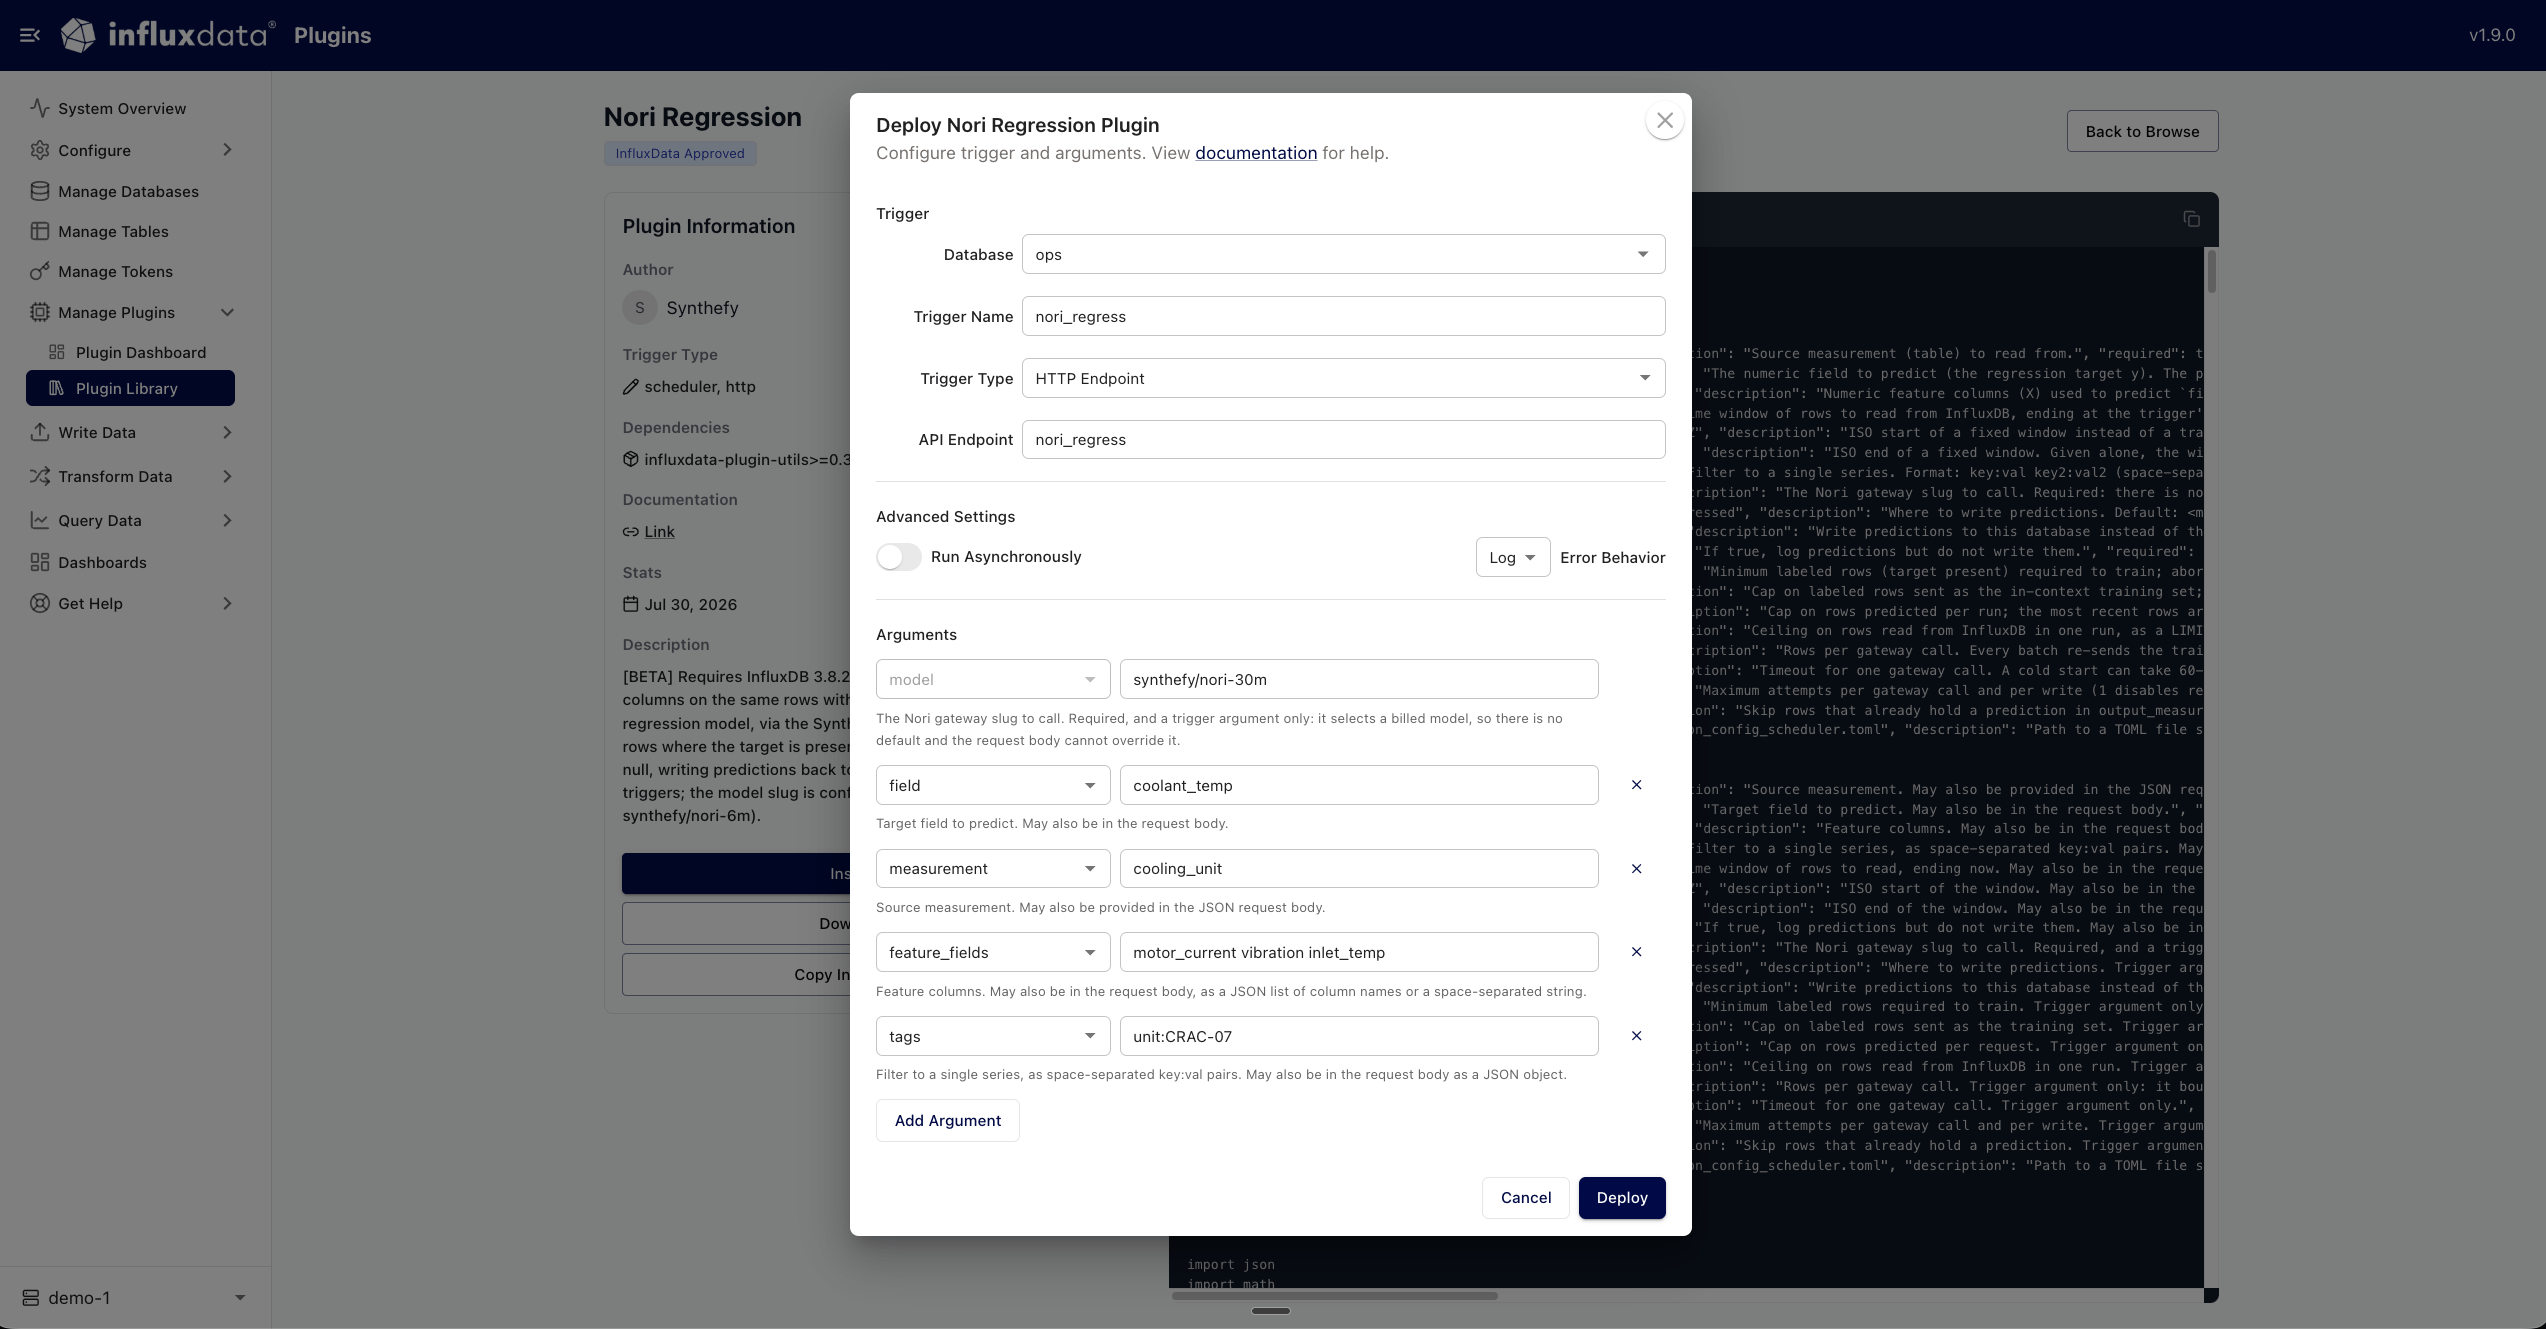
feature_fields and tags take space-separated values, because
--trigger-arguments splits pairs on commas.4
Run it, with your key in the request
Pass the key as an 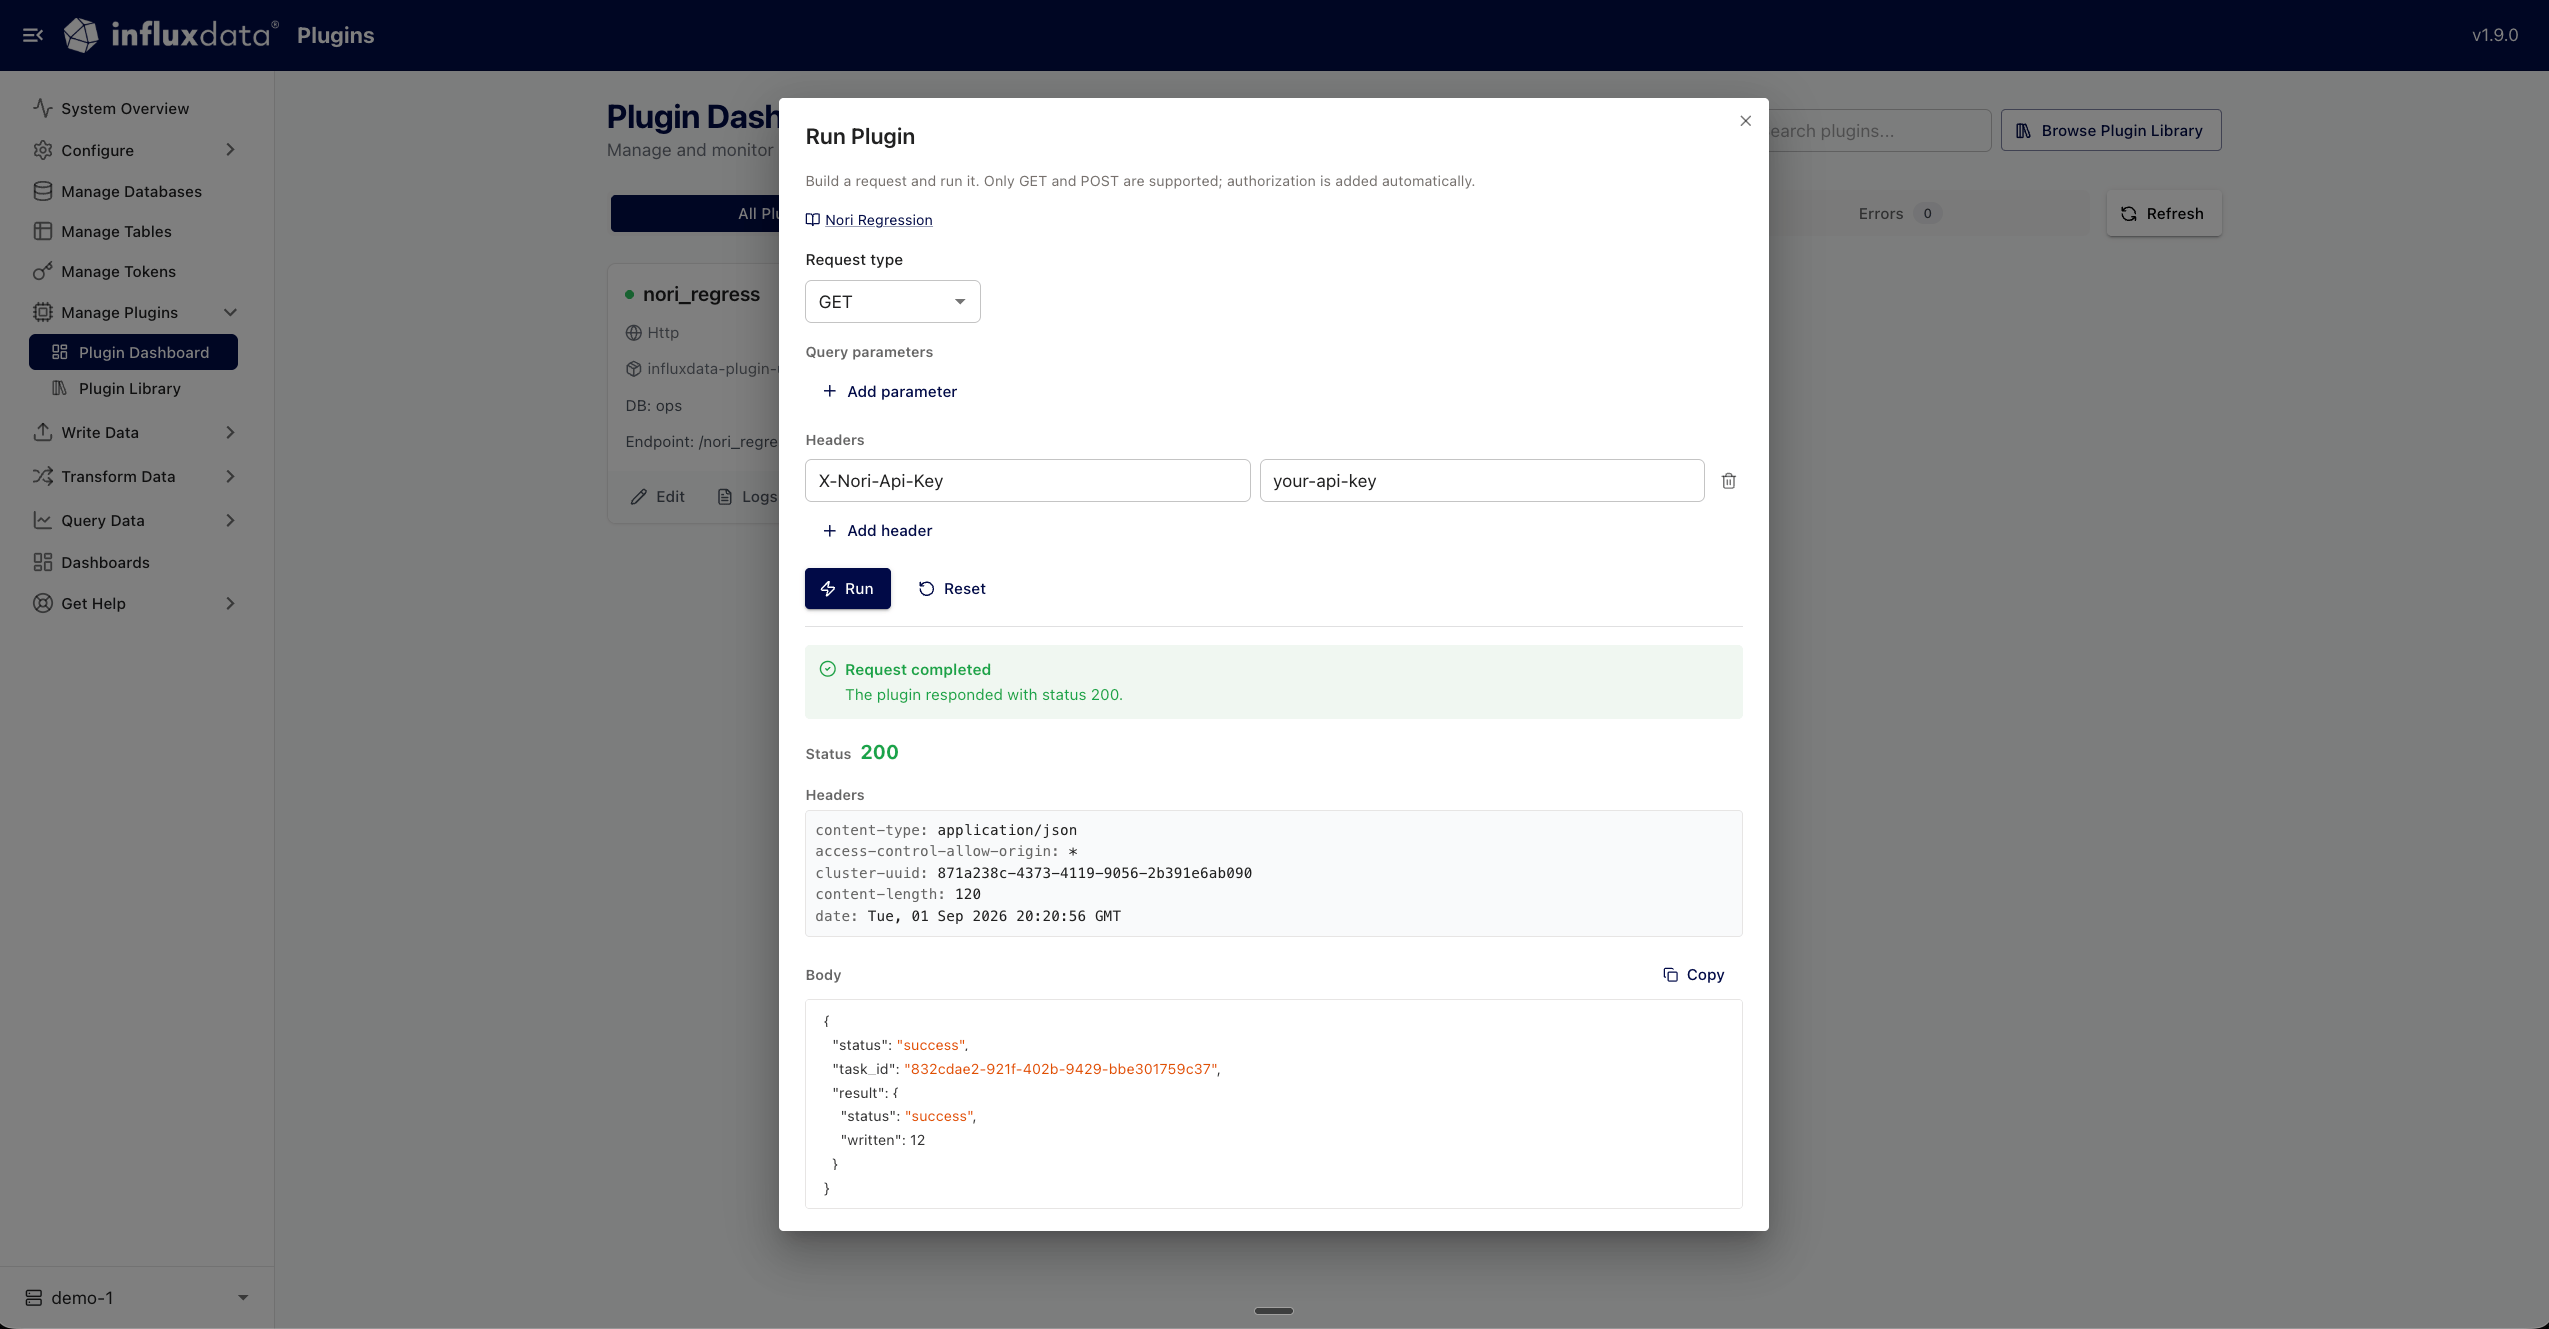
X-Nori-Api-Key header. It never touches your database.written is the number of rows filled, the 20:00 and 21:00 rows in the table
above.In Explorer, the trigger card has a Run Now button that opens a request
builder. Add X-Nori-Api-Key under Headers and run it there:5
Read the predictions
model, source and target, plus every tag of
the row it was predicted for.Closing gaps automatically
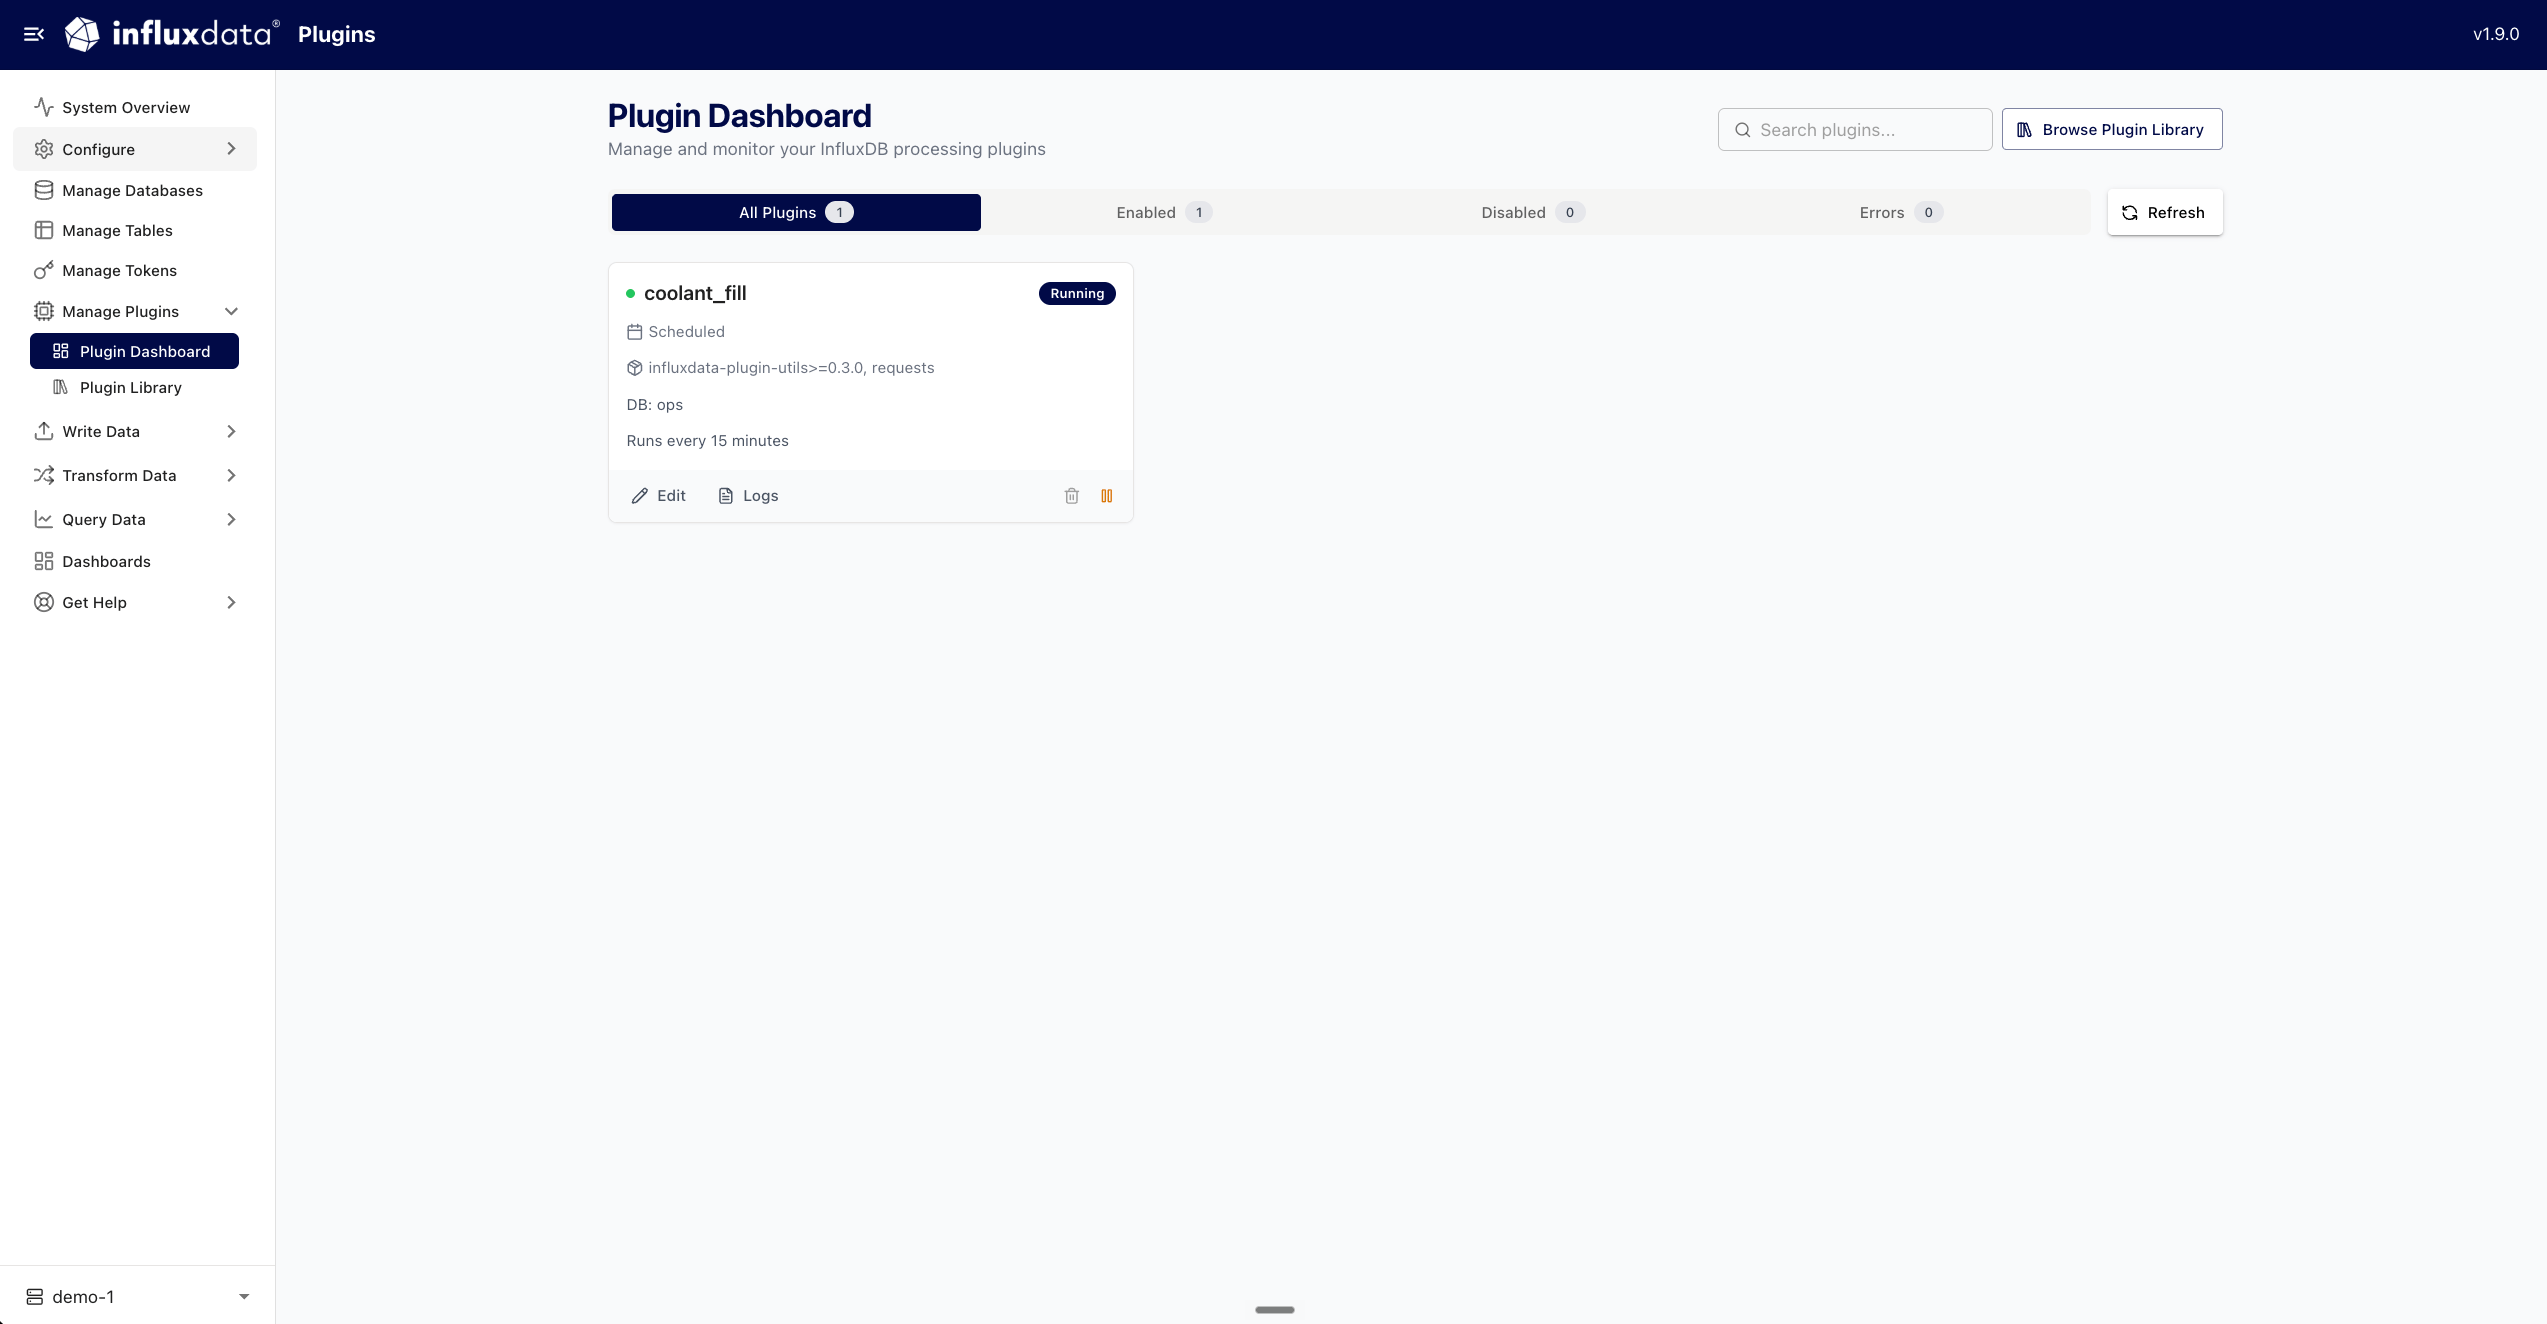
To keep a column filled without calling anything, give the trigger a schedule instead of an endpoint. A scheduled run has no caller to carry a header, so the key has to be on the InfluxDB server, in the environment of the process itself.Set up a scheduled trigger
Set up a scheduled trigger
Put the key in the InfluxDB server’s environment and restart it:Set it wherever your InfluxDB process gets its environment: 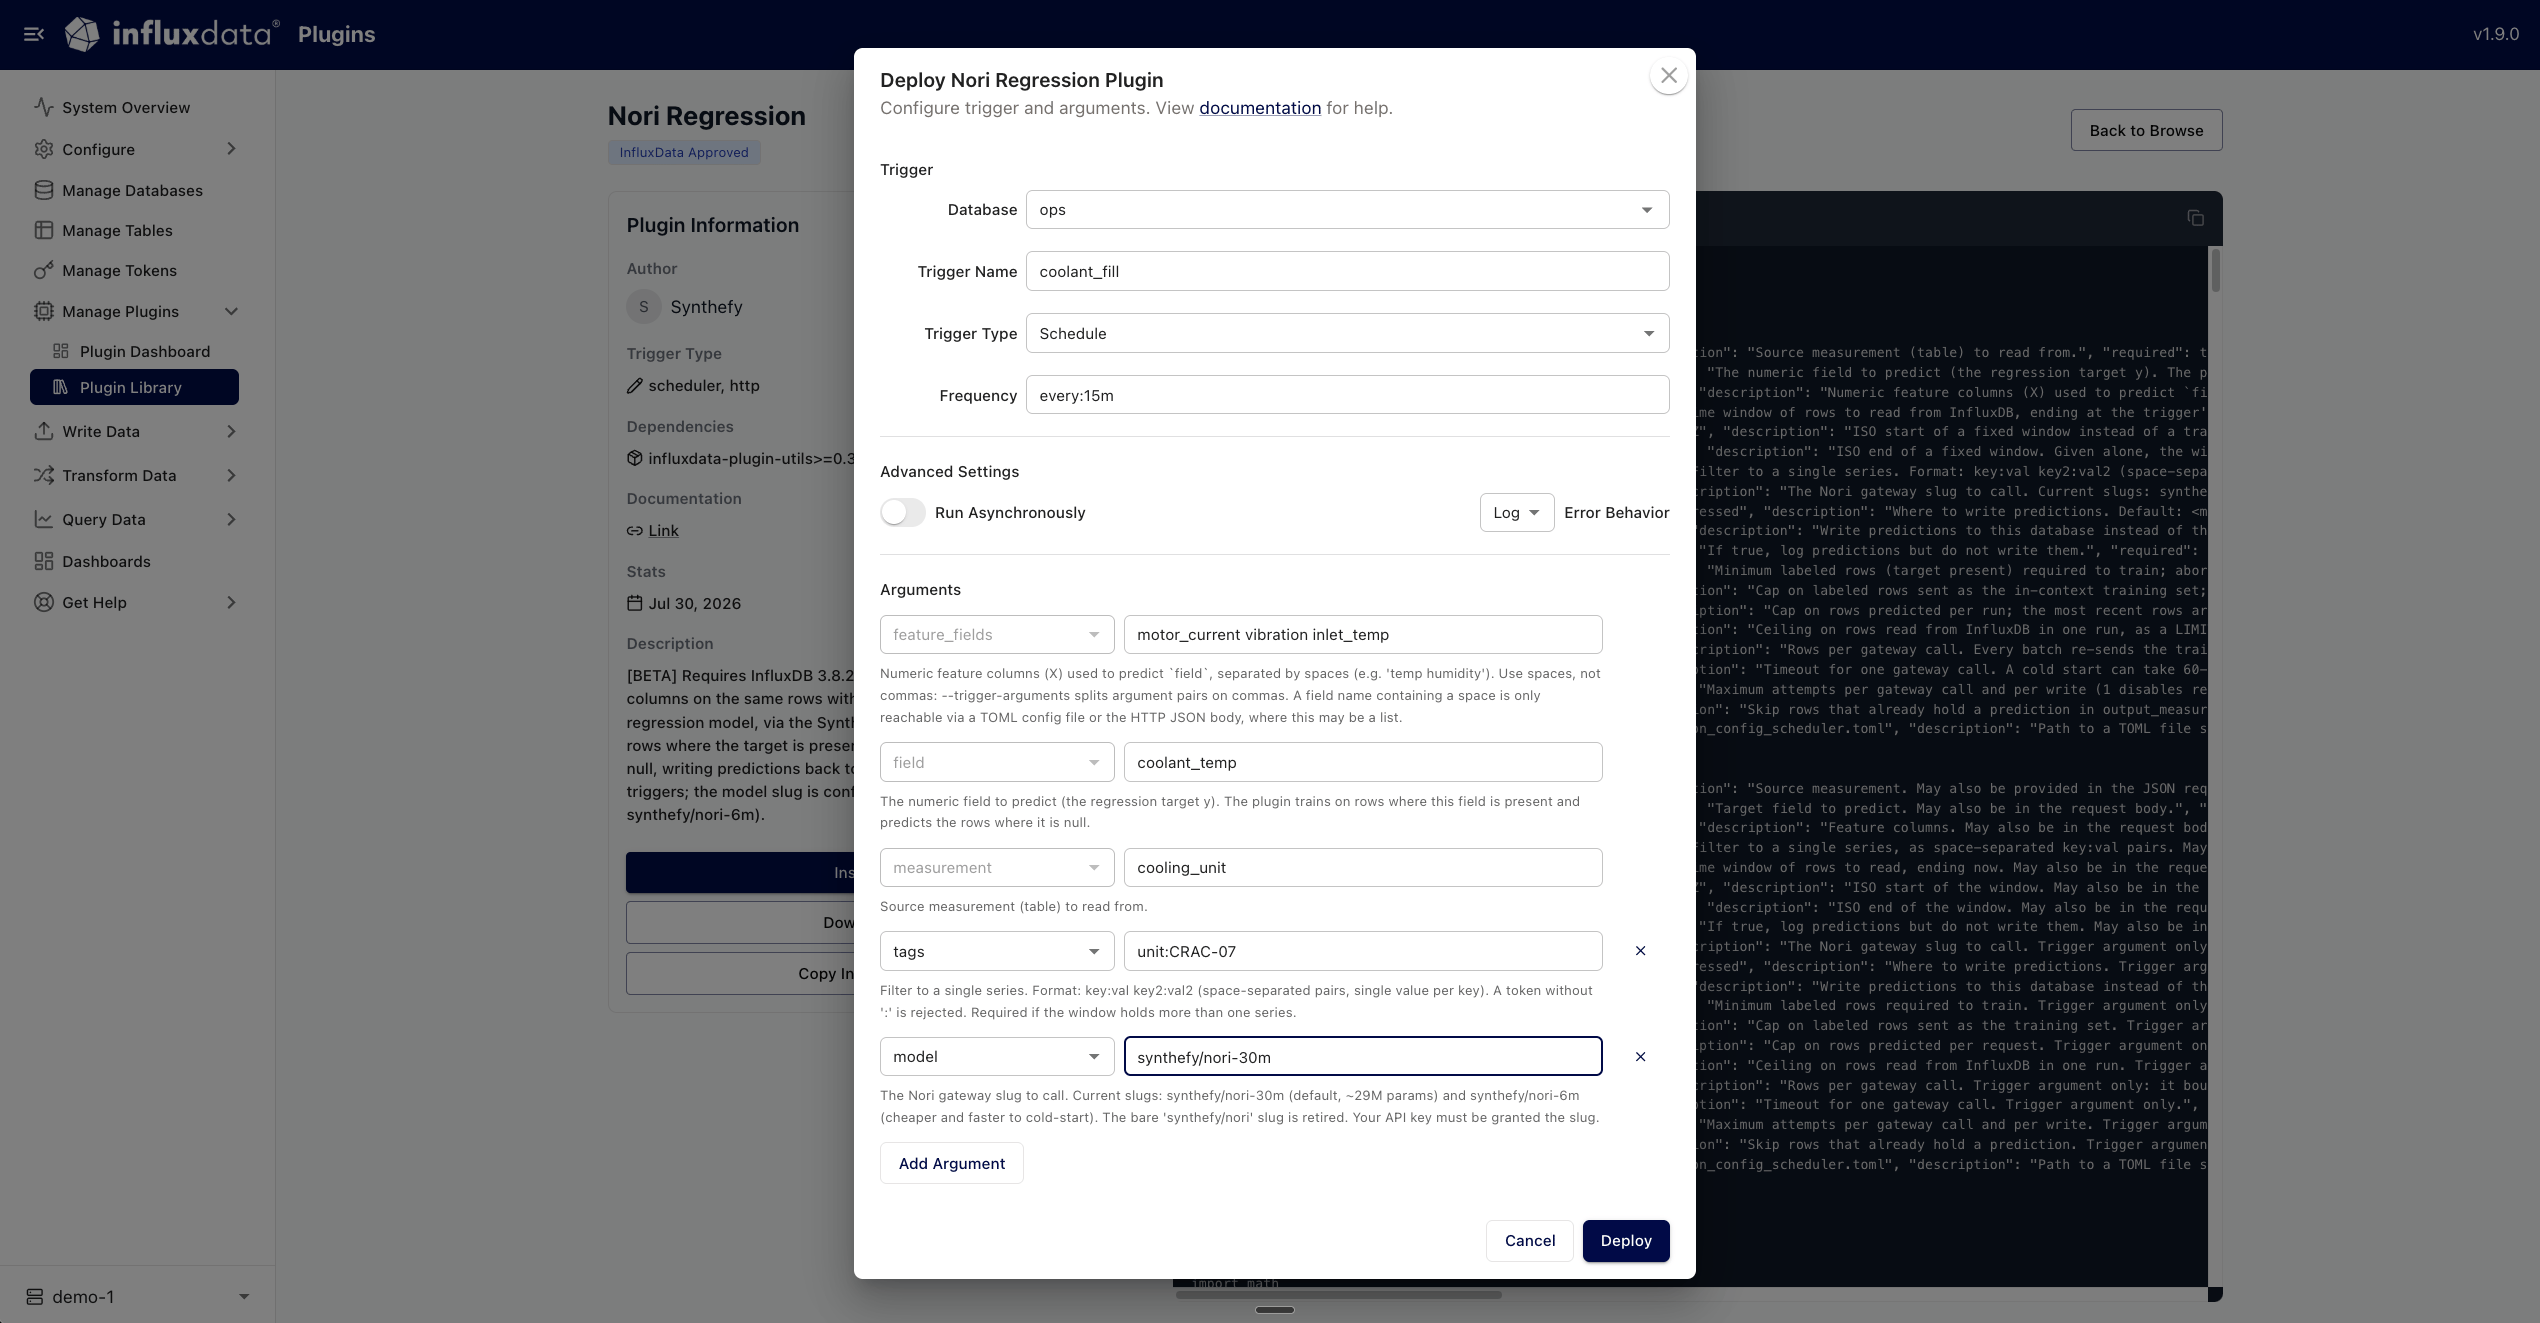
-e or
--env-file for Docker, environment: for Compose, Environment= in the
systemd unit, or a secretKeyRef in Kubernetes. The plugin reads it from the
server, never from trigger arguments or the request body, because both are
written to logs.Then create the trigger with a frequency rather than an endpoint. The arguments
are the same:coolant_temp that do not have a
prediction yet, and skips the ones that do, so a repeating schedule does not
pay for the same row twice.Parameters
The full reference, including retry and batching behaviour, is in the
plugin documentation.
What a run costs
Each call to the gateway is metered on the same request dimensions as a direct API call: the example rows sent as context and the number of feature columns, reported in theusage object described in the Quickstart.
Three parameters bound what a schedule spends: max_train_rows caps the example
rows per call, predict_batch_size caps the number of calls, and skip_existing
stops a repeating schedule paying again for rows it has already predicted.
Good to know
One series per run. The plugin counts the distinct tag combinations in the
window and stops before calling Nori if there is more than one, so two series
are never fitted as one. Use
tags to select the series you want.A row is predicted when the target is empty and every feature column is
present. Rows missing a feature are left alone.
Next steps
Snowflake
Call Nori from Snowflake SQL, with no data export.
Amazon SageMaker
Deploy Nori as a SageMaker endpoint in your own AWS account.
Nori Quickstart
The model sizes and the request/response contract.
Python Client
Call the same models from Python.